Dockge: Manage Compose Stacks in the Browser
Set up Dockge 1.5 behind Traefik: edit and deploy Compose stacks in the browser and follow the logs live – without lock-in, the files stay plain compose.yaml.
Table of contents
Anyone running several Compose stacks knows the routine: SSH in, change into the right folder,
docker compose pull && up -d, check the logs, next stack. Dockge brings exactly those steps into
the browser – while writing perfectly ordinary compose.yaml files that you can still touch from the
CLI.
What are we building?
At the end, Dockge 1.5.0 runs behind your Traefik at https://YOUR_DOMAIN. You create stacks in
the browser, edit their compose.yaml, deploy them with one click and watch the output of
docker compose up live – including container logs and a Bash console per container.
The decisive difference from heavyweight Docker interfaces: Dockge does not invent a format of its
own. Every stack is a folder under /opt/stacks/<name>/ with a compose.yaml and an .env.
docker compose ls lists them as normal projects. You can switch Dockge off tomorrow and carry on as
if it had never existed – no lock-in.
On resources: the container used around 143 MiB RAM in the test with virtually no CPU load. The image, however, is no lightweight at 1.17 GB – worth knowing if your VPS has a small system disk.
Dockge is root on your server
/var/run/docker.sock). Anyone with access to this interface can
start arbitrary containers – privileged ones included – and thereby take over the whole host. So
this applies more strictly here than for any other app: reachable over HTTPS only, a long unique
password, and if possible restricted to your own IP as well (see
Setting up a firewall with UFW). A Dockge on the open internet
with a weak password is a compromised server.Prerequisites
- A server running Debian 13 with Docker (tested on a netcup VPS with Docker 29.6.1 and Compose v5.3.1)
- Docker Compose basics – Dockge does not save you the understanding, only the typing
- A running Traefik with its
proxynetwork as in Traefik as a reverse proxy - A subdomain pointing at your server (connecting a domain)
VPS 1000 G12.5
4 vCores · 8 GB RAM · 128 GB SSD
from €14.50/month
Dockge itself is tiny – what matters is what you run with it.
💶 1 month free for new netcup customers:
Single use, valid for VPS 1000 G12.5. Redeem in the cart →
💶 €5 voucher for new netcup customers: always valid · not for domains or VPS Lite
Step by step
1. Decide on the stacks directory
Dockge manages all stacks below one folder. The default is /opt/stacks, and we stick with it –
it matches the convention used in the other recipes:
mkdir -p /opt/stacks /opt/dockge/dataHost and container path must be identical
/opt/stacks:/opt/stacks.
Dockge calls docker compose through the host’s socket – so the daemon interprets paths from the
host’s point of view. If you mount /opt/stacks to /app/stacks, Dockge finds the files in its
own view but the daemon does not: deployments fail with „no such file or directory".2. The Compose file for Dockge
Create /opt/dockge/compose.yaml and replace YOUR_DOMAIN:
services:
  dockge:
    image: louislam/dockge:1.5.0
    restart: unless-stopped
    environment:
      DOCKGE_STACKS_DIR: /opt/stacks
    volumes:
      - /var/run/docker.sock:/var/run/docker.sock
      - ./data:/app/data
      - /opt/stacks:/opt/stacks
    networks: [proxy]
    labels:
      - "traefik.enable=true"
      - "traefik.http.routers.dockge.rule=Host(`YOUR_DOMAIN`)"
      - "traefik.http.routers.dockge.entrypoints=websecure"
      - "traefik.http.routers.dockge.tls.certresolver=le"
      - "traefik.http.services.dockge.loadbalancer.server.port=5001"

networks:
  proxy:
    external: true
How the pieces fit together:
DOCKGE_STACKS_DIRmust match the mount target exactly (step 1)../dataholds Dockge’s own SQLite database: users, settings, JWT secret.loadbalancer.server.port=5001– inside the container Dockge listens on 5001. We publish no port to the outside; only Traefik reaches it through theproxynetwork.- No
user:entry: Dockge has to talk to the Docker daemon through the socket and write the stack files.
Start it:
cd /opt/dockge && docker compose up -ddocker compose psThe container ships a healthcheck, so you should see (healthy):
NAME              STATUS
dockge-dockge-1   Up 12 seconds (healthy)
A look at the logs confirms the first start:
docker logs --tail 5 dockge-dockge-1[SERVER] INFO: Connected to the database
[SERVER] INFO: JWT secret is not found, generate one.
[SERVER] INFO: Stored JWT secret into database
[SERVER] INFO: No user, need setup
[SERVER] INFO: Listening on 5001No user, need setup means the server is waiting for your admin account.
3. Create the admin account
Open https://YOUR_DOMAIN. Dockge redirects to /setup and asks for a username and password. The
interface follows your browser’s language.
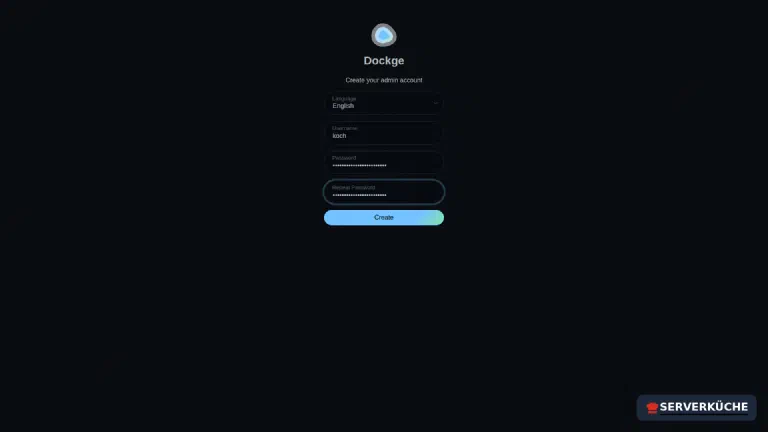
After that the door is shut: there is no open registration, further accounts are created in the settings. Use a long, unique password from your password manager – see the warning above.
4. Understanding the home screen
After logging in you see every Compose project Docker knows about on this host – in the example the
existing traefik stack plus the one just created:
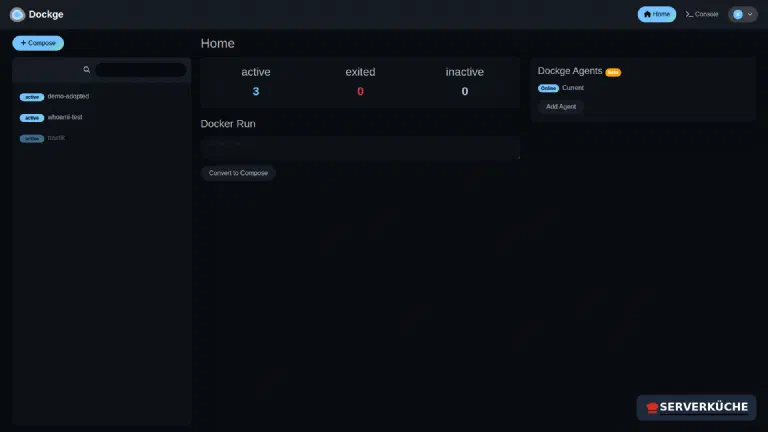
On the left, Dockge counts active, exited and inactive. Important: the list shows all
projects, but Dockge can only manage those below /opt/stacks. How to adopt existing stacks is step 7.
5. Create and deploy the first stack
Click Compose at the top. You land in the editor: on the left a form for the stack name and
containers, on the right the compose.yaml – both sides are linked, so you can click or write
YAML.
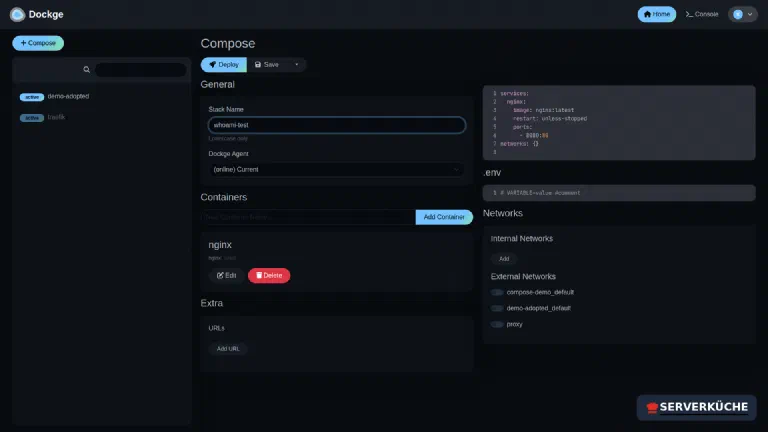
Give the stack a name (lowercase only – it becomes the folder and project name) and adjust the YAML. A
click on Deploy runs docker compose up -d, and the real output scrolls by in the terminal pane:
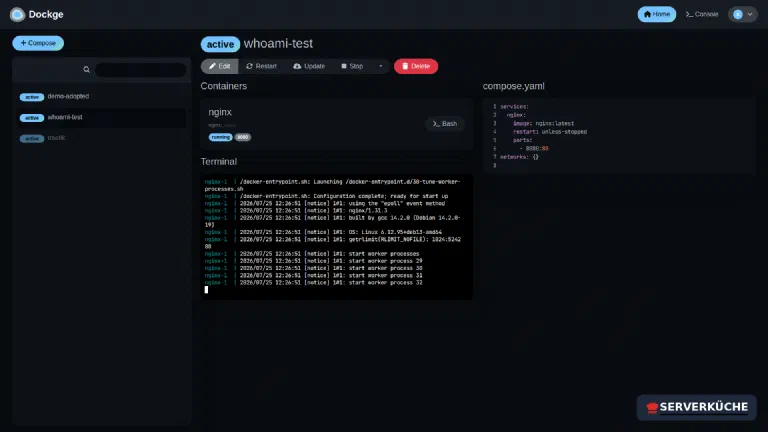
The container entry shows status and published ports, with the logs running below. Each container also gets a Bash button that opens a console inside it – handy for quickly checking a configuration.
6. What happens on disk
This is the part that sets Dockge apart from heavyweight interfaces. After deploying, the server holds exactly what you would expect:
find /opt/stacks -type f/opt/stacks/whoami-test/.env
/opt/stacks/whoami-test/compose.yamlAnd Docker knows the stack as a perfectly ordinary Compose project:
docker compose lsNAME STATUS CONFIG FILES
dockge running(1) /opt/dockge/compose.yaml
traefik running(1) /opt/traefik/compose.yaml
whoami-test running(1) /opt/stacks/whoami-test/compose.yamlSo you can SSH into the folder at any time and carry on as usual:
cd /opt/stacks/whoami-test && docker compose psNAME STATUS PORTS
whoami-test-nginx-1 Up 35 seconds 0.0.0.0:8080->80/tcp, [::]:8080->80/tcpBoth hold at the same time: changes in the browser are visible to the CLI, changes from the CLI show up in the browser after a reload. Dockge is a remote control, not a new system.
7. Adopt existing stacks
A stack outside /opt/stacks appears in the list but cannot be touched – Dockge says so plainly:
„This stack is not managed by Dockge." There is neither an edit nor a deploy button.
To adopt it, move the folder. Assuming your stack lives in /opt/myapp:
cd /opt/myapp && docker compose down
mv /opt/myapp /opt/stacks/myapp
cd /opt/stacks/myapp && docker compose up -d
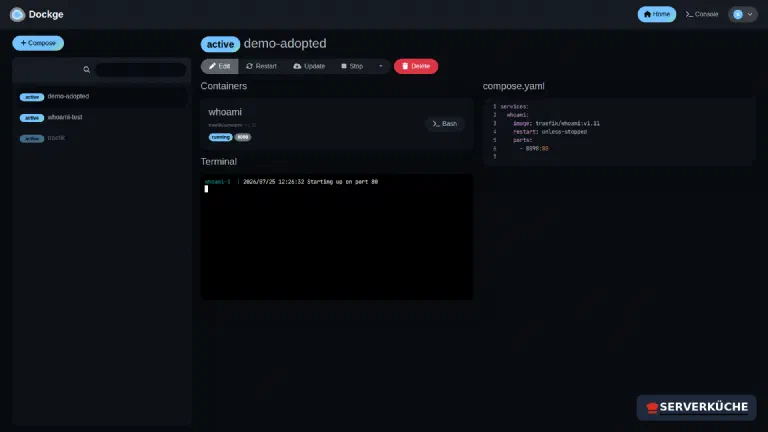
The project name is derived from the folder name – keep it the same and your containers keep their names and named volumes survive. Dockge then manages the stack fully:
Tip
8. Convert docker run commands
Many projects only document a long docker run command. The home screen has a field for exactly
that: paste the command, click Convert to Compose – and you land in the editor with finished YAML.
This
docker run -d --name uptime -p 3001:3001 -v uptime-data:/app/data \
  --restart unless-stopped louislam/uptime-kuma:2.5.3
becomes:
services:
  uptime-kuma:
    container_name: uptime
    ports:
      - 3001:3001
    volumes:
      - uptime-data:/app/data
    restart: unless-stopped
    image: louislam/uptime-kuma:2.5.3
volumes:
  uptime-data:
    external: true
    name: uptime-data
Very handy – with one trap: the named volume is written as external: true, i.e. „already
exists". On a fresh installation the volume does not exist yet, and the deployment fails. Either
delete those two lines (then Compose creates the volume itself) or create it beforehand with
docker volume create uptime-data. For the difference, see
volumes vs. bind mounts.
9. Console and agents – decide deliberately
Two features you should know about before switching them on:
Console. The console menu entry is disabled by default, and that is a good thing. Dockge states why itself: it allows arbitrary commands inside the Dockge container – and that container has the Docker socket. Enabled, it means a root shell on your host in the browser. Leave it off; for the rare case, SSH is enough.
Agents (beta). Dockge can attach further servers and manage their stacks in the same interface. That is convenient if you run several machines – but the feature is marked beta, and every attached agent increases the damage if this one interface is ever compromised. To start with: one server, one Dockge.
10. Updates with one click
The Update button on a stack does exactly what you would otherwise type: pull new images and bring
the stack back up. If the image is already current, nothing happens – in the test the container kept
running unchanged afterwards (same start time), so it is not restarted without reason. That is
convenient – and precisely why you should keep pinning your images instead of using latest.
Otherwise one click turns into a jump across several major versions without you noticing. Why that
matters is covered in
keeping your Docker stack up to date.
When things go wrong
Traefik answers with 404 although the container is healthy. Usually
traefik.http.services.dockge.loadbalancer.server.port=5001 is missing. Inside the container Dockge
listens on 5001; without that line Traefik guesses. Also check that the container is attached to the
proxy network.
The deployment aborts with „no such file or directory". The host and container paths of the stacks
directory do not match. It must be mounted as /opt/stacks:/opt/stacks with
DOCKGE_STACKS_DIR=/opt/stacks – Dockge has the host’s Docker daemon do the work, and that daemon
only knows host paths.
A stack is visible but all buttons are missing. Then it lives outside /opt/stacks and Dockge
shows „This stack is not managed by Dockge." Move the folder as in step 7 – Dockge neither adopts it
by itself nor makes a copy.
The stack name is rejected. Only lowercase letters, digits and hyphens are allowed, because they
become the folder and Compose project name. My App won’t do, my-app will.
After a restart the login is gone. Then ./data was not mounted persistently – that is where the
database and JWT secret live. Check that /opt/dockge/data exists and is bound in the Compose file.
The interface is in the wrong language. Dockge follows the browser and falls back to English for unknown combinations; the settings let you pin the language.
Your problem is not listed? Search all error messages →
Maintenance & backups
Honest about the project’s state. Dockge is popular (around 24,000 stars) and still being
developed – the most recent commits in the repository are from April 2026, among them container
controls and a resource display. The last stable release 1.5.0, however, dates from 30 March 2025,
more than a year ago. There is a nightly tag with the newer features – but it is explicitly not a
release.
In practice that means: stay on 1.5.0 (completely unproblematic with Docker 29.6.1 and Compose
v5.3.1 in the test), do not expect quick bug fixes, and do not make an operational decision that
depends on a new version arriving tomorrow. For „manage stacks conveniently" it is enough – you just
want to know what you are getting into.
Updating Dockge itself works like any other stack, but from the CLI (the interface cannot restart itself):
cd /opt/dockge && docker compose pull && docker compose up -dBackups. Two things need saving, and both are small:
/opt/dockge/data– Dockge’s database with accounts and settings/opt/stacks– this is where the actual work lives: everycompose.yamland.envof your services
That makes /opt/stacks your central configuration location from now on – one more reason to back it
up daily with Restic. The data of your applications (volumes, bind
mounts) is not covered by Dockge; that still needs its own strategy.
Review access regularly. Because Dockge means root rights on the host, maintenance includes the question: who can actually reach it? The Traefik logs show who requests the login page – if unfamiliar IPs turn up there, an IP restriction or access only via WireGuard is the better answer than an even longer password.
Send feedback: feedback@serverkueche.de
You might also like