Self-hosting Jellyfin: your own media server behind Traefik
Set up Jellyfin with Docker behind Traefik: stream your movies, series and music – with HTTPS and the library on netcup's Local Block Storage.
Table of contents
Netflix, Spotify and Google Photos in one – only on your own server and without a monthly fee: Jellyfin streams your movie, series and music collection to any device. In this recipe we hang Jellyfin behind Traefik and put the library on netcup’s Local Block Storage so you don’t run out of space.
What are we building?
By the end, Jellyfin 12.2 runs as a container on your server, reachable at
https://jellyfin.YOUR_DOMAIN with valid HTTPS. Jellyfin is a completely free media server
(no cloud, no telemetry, no subscription): you store your files, Jellyfin automatically
pulls covers, descriptions and metadata and streams everything to the browser, phone,
smart TV or the Jellyfin app.
The real challenge with a media server is storage space – a movie collection quickly bursts the small system SSD of a VPS. That’s why we mount netcup’s Local Block Storage: an additional, local disk that appears in the server like a normal drive and on which the library lives.
Honest about transcoding
Prerequisites
- A running Traefik reverse proxy with the
proxynetwork and the resolverle– see reverse proxy with Traefik. - A subdomain
jellyfin.YOUR_DOMAINwith a DNS record to your server IP – see connecting a domain to your server. - Dedicated CPU cores are clearly at an advantage for smooth streaming (transcoding). On a shared VPS it works too for Direct Play, but gets tight quickly on re-encoding.
- Optional but recommended: booked netcup Local Block Storage for the library (step 2). Without it, you simply put the media in a folder on the system disk – until the space runs out.
- A few of your own media files (movies/series/music) that you’re allowed to host.
Whether your setup really needs dedicated cores is shown by the server calculator – with transcoding the answer is usually yes.
Root-Server RS 1000 G12.5
4 dedicated cores · 8 GB RAM · 128 GB NVMe
from €21.73/month
Dedicated cores for transcoding – and Local Block Storage can be added on.
💶 2 months free:
Single use, valid for Root-Server RS 1000 G12.5. Redeem in the cart →
💶 €5.95 voucher for new netcup customers: always valid · not for domains or VPS Lite
Step by step
Step 1: Create the DNS record
Create jellyfin.YOUR_DOMAIN (A/AAAA to your server IP) and check that it resolves:
dig +short jellyfin.YOUR_DOMAINYour server IP must come back – otherwise Traefik won’t fetch a certificate later.
Step 2: Mount netcup Local Block Storage
The Local Block Storage is additional storage you book to your server in the netcup customer account. Unlike the network-attached Storage Space of other providers (which is connected via NFS and is slower), it appears in the server as a completely normal local disk – ideal for a library because it’s fast and freely partitionable.
No block storage booked?
~/jellyfin/media – all the
following commands work the same, only the path is different. You can add the block storage
later at any time and move the data.First look at which disks the server knows:
sudo fdisk -lThe system disk is typically /dev/sda (or /dev/vda). The new block storage appears as
an additional device, usually /dev/vdb – recognizable by the size you booked.
Check first, then partition
Create a partition on the new disk (here /dev/vdb):
sudo cfdisk /dev/vdbChoose gpt at the prompt (the modern standard – dos/MBR can address at most 2 TiB,
libraries like to grow beyond that), then New, take the full size, and write the table
with Write (type yes), then Quit. The partition /dev/vdb1 is created. Format it
with an ext4 filesystem:
sudo mkfs.ext4 /dev/vdb1Create a mount point and mount the partition:
sudo mkdir -p /mnt/media
sudo mount /dev/vdb1 /mnt/media
So that the disk is mounted automatically even after a reboot, you enter it in
/etc/fstab with its UUID (not with /dev/vdb1, which can change). Read out the UUID:
sudo blkid /dev/vdb1/dev/vdb1: UUID="a1b2c3d4-...." TYPE="ext4" ...Open the fstab and append the line with your UUID:
sudo nano /etc/fstabUUID=a1b2c3d4-.... /mnt/media ext4 defaults,nofail 0 2The nofail is not a detail. Without it, systemd treats the disk as required for booting:
if it is ever missing – after cancelling the add-on, during maintenance, after a move – the
server boots into emergency mode and can no longer be reached over SSH. With nofail it
still starts, just without the media library. Why that is and how to check it is covered in
Mounting Local Block Storage (Tutorial expected in December).
Check the entries before you rely on the reboot – a typo in the fstab can block the
boot process. After every change systemd has to re-read the file first:
sudo systemctl daemon-reload
sudo umount /mnt/media && sudo mount -a && df -h /mnt/media
If no error appears here and df -h shows your new disk under /mnt/media, everything is
entered correctly.
Step 3: Create the project and media folders
Create the Compose project – the configuration is small and may go on the system disk. You
create the subfolders config and cache right along, before the container starts for
the first time: if the Docker daemon created them first, they would belong to root – but
Jellyfin runs as UID 1000 (see step 4) and couldn’t write into its own /config, the
container would crash on the first start.
mkdir -p ~/jellyfin/{config,cache} && cd ~/jellyfinAudiobooks belong elsewhere
And the folder structure for the library on the block storage. Jellyfin sorts best when movies, series and music are kept separate:
sudo mkdir -p /mnt/media/{filme,serien,musik}So that the Jellyfin container may read the files, they have to belong to your user.
Determine your user and group ID (usually 1000) and hand over the folder:
id -u && id -g
sudo chown -R 1000:1000 /mnt/media
Now copy your media into the appropriate subfolders (via scp, rsync or an SFTP client).
For clean recognition, a clear naming helps, e.g. filme/The Godfather (1972)/The Godfather (1972).mkv.
Step 4: The compose.yaml
Now the central file. Replace jellyfin.YOUR_DOMAIN with your subdomain:
services:
  jellyfin:
    image: jellyfin/jellyfin:12.2
    user: "1000:1000"
    environment:
      - JELLYFIN_PublishedServerUrl=https://jellyfin.YOUR_DOMAIN
    volumes:
      - ./config:/config
      - ./cache:/cache
      - /mnt/media:/media:ro
    labels:
      - "traefik.enable=true"
      - "traefik.http.routers.jellyfin.rule=Host(`jellyfin.YOUR_DOMAIN`)"
      - "traefik.http.routers.jellyfin.entrypoints=websecure"
      - "traefik.http.routers.jellyfin.tls.certresolver=le"
      - "traefik.http.services.jellyfin.loadbalancer.server.port=8096"
    networks:
      - proxy
    restart: unless-stopped

networks:
  proxy:
    external: true
What the lines mean:
image: …:12.2– the fixed, current stable version. Nolatest(see “Maintenance & backups”).user: "1000:1000"– Jellyfin runs with your user/group ID so it can read the media. If you adjust other IDs in step 3, change them here too.JELLYFIN_PublishedServerUrl– tells Jellyfin under which public address it’s reachable. This prevents app links from suddenly pointing to an internal IP.volumes:config(settings, users, metadata) andcachelive small in the project folder; the library is mounted from the block storage under/mnt/mediainto the container as/media–:ro(read-only), so Jellyfin never changes your originals.- The four Traefik labels are the familiar pattern. New is only the port: Jellyfin
listens on 8096, hence the
loadbalancer.server.portlabel. Without the label Traefik guesses the port from the image – which works out for the Jellyfin image, because it exposes exactly one port. Don’t rely on that: as soon as an image brings several ports, Traefik picks the wrong one and you get a502 Bad Gateway. - No
ports:– Jellyfin is reachable exclusively via Traefik (HTTPS), not directly from the internet.
Start the stack and watch it boot:
docker compose up -d
docker compose logs -f jellyfin
On the first start, certificate issuance takes a few seconds. Once Startup complete
appears in the log, Jellyfin is ready.
Step 5: The initial setup wizard
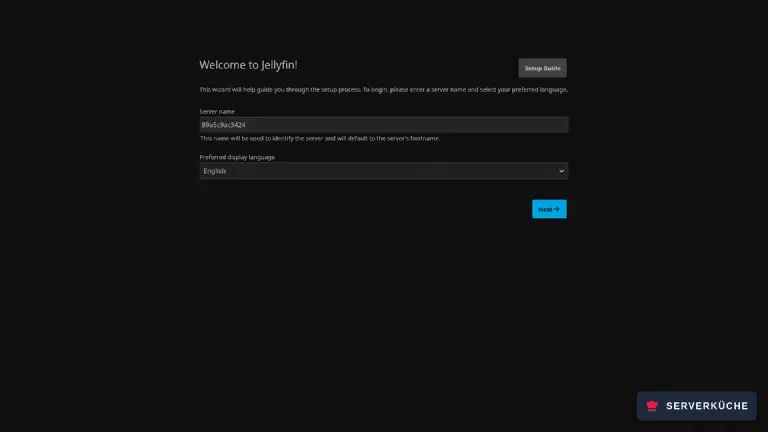
Open https://jellyfin.YOUR_DOMAIN in the browser. On the very first call, a wizard guides
you through the basic setup:
- Set the server name and the preferred display language. Pre-filled is the
container’s hostname – a random hex string like
89a5c9ac3424. The server shows up under this name in the apps later, so a speaking name is worth it. - Create an administrator account – set a long, unique password, because the login page is publicly on the net.
- Add media libraries: click “Add Media Library”, choose the type (e.g. Movies), and
enter the container path as the folder – i.e.
/media/filme(not/mnt/media/filme, that’s the path on the host!). Matching that, the directory picker only shows container paths: besides the root/, the three mounted folders/media,/configand/cache. Repeat this forserienandmusik. - Set the metadata language and country.
- Configure remote access: “Allow remote connections to this server” stays on – otherwise you lock yourself out from the outside. There’s nothing else to do on this page; Traefik takes care of the route from outside.
- Click Finish. Jellyfin sends you to the login page, where you sign in with the account you just created.
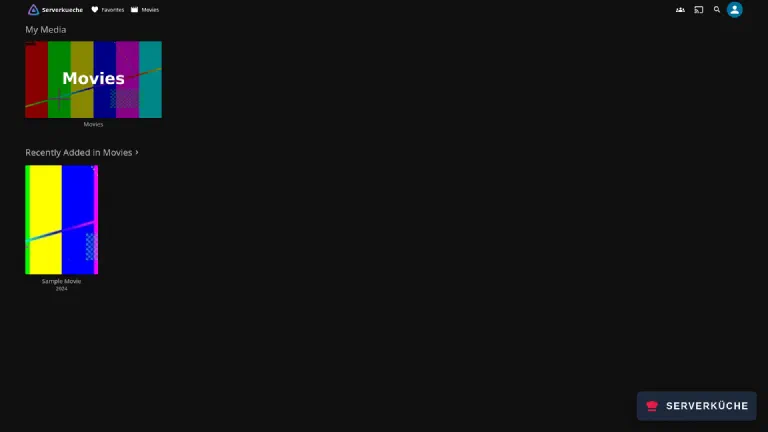
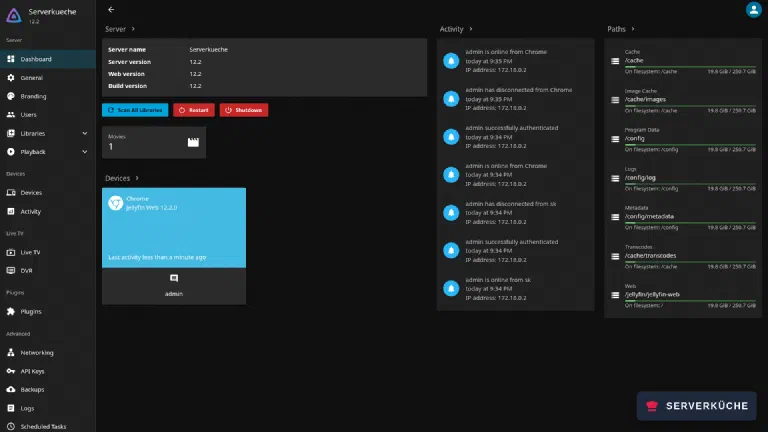
After the wizard, Jellyfin scans the folders and loads covers and descriptions. For large collections the first scan takes a while – you see the progress under Dashboard → Scheduled Tasks. After that you land on the home page and see your library with the first titles:
Step 6: Configure Jellyfin cleanly behind the proxy
Two settings make Jellyfin work correctly behind Traefik. Open Dashboard → Networking:
Under Known proxies you enter the Traefik network so Jellyfin sees the real client IP
(instead of Traefik’s container IP). For that, have all subnets of the proxy network
printed:
docker network inspect proxy --format '{{range .IPAM.Config}}{{.Subnet}} {{end}}'fd00:cafe::/64 172.18.0.0/16A network created with IPv6, as in the Traefik tutorial, has two subnets. Enter both, comma separated – the field accepts CIDR notation:
fd00:cafe::/64,172.18.0.0/16The first subnet alone is not enough
--format '{{ (index .IPAM.Config 0).Subnet }}' that only grabs the first entry
returns the IPv6 line (fd00:cafe::/64) on a dual-stack network. But Traefik talks to the
container over IPv4 – with only the IPv6 range in the field, Jellyfin keeps logging Traefik’s
container IP. So enter both subnets.The setting only takes effect after a restart, which the interface points out right below the field:
docker compose restartYou can check whether it worked under Dashboard → Activity: before, every login showed
Traefik’s container IP (172.18.0.2 or similar), afterwards it shows the real IP of the
device you signed in from.
With HTTPS there is nothing to do: since Traefik handles the encryption, Jellyfin itself needs no TLS. Leave the HTTPS options in Jellyfin empty – everything runs via the proxy.
WebSockets (for live updates of the interface) Traefik forwards automatically, nothing to do there.
Step 7: Transcoding vs. Direct Play
Whether your server breaks a sweat is decided here. Two cases:
- Direct Play – the end device can play the file as-is. The server just pushes bytes through, almost no CPU load. That’s the ideal case.
- Transcoding – format, codec or bitrate don’t fit the device (or the line is too slow), so Jellyfin re-encodes live. On a netcup server this happens via the CPU – with a 4K stream that can max out a whole server.
This is how you keep the load low:
- Provide suitable formats: H.264/AAC in an
.mp4/.mkvplays directly on practically every device. Exotic codecs (e.g. certain 4K HEVC audio tracks) force transcoding. - Set the client quality in the app to “Original/Direct Play” when the line is enough.
- Under Dashboard → Playback you can set the transcoding settings and a limit for simultaneous streams.
Hardware transcoding needs a GPU
/dev/dri. Standard VPS and root servers at netcup are KVM machines without a
passed-through GPU – leave hardware acceleration off there, it would only produce errors.
Instead plan with dedicated CPU cores and Direct Play.When things go wrong
502 Bad Gateway on access, even though the container is running. Traefik reaches the
container but hits the wrong port. Jellyfin listens on 8096 – check the label
traefik.http.services.jellyfin.loadbalancer.server.port=8096 for typos. If a
504 Gateway Timeout comes back after a few seconds instead, the port isn’t the
problem, the network is: then networks: [proxy] is missing and Traefik is running against
an address it can’t reach at all.
The libraries stay empty, even though files are there. Almost always a permission
problem. The container runs as 1000:1000 (step 4), so the media must belong to that
user: sudo chown -R 1000:1000 /mnt/media. And: in Jellyfin the container path must be
entered (/media/filme), not the host path. Afterwards click “Scan All Libraries” at the
top of the Dashboard – under Scheduled Tasks the same job is called “Scan Media
Library”.
Video stutters/buffers, docker stats shows Jellyfin at ~100% CPU. It’s
transcoding. Under Dashboard → Playback the activity monitor shows whether it says
“Transcode” instead of “Direct Play”. Set the client quality to original, change exotic
codecs to a widely supported format, or give the server more (dedicated) cores.
After a reboot the library is gone and Jellyfin shows empty folders. The block storage
wasn’t mounted – usually a missing or wrong fstab entry (step 2). Check with df -h /mnt/media and sudo mount -a. The line must use the UUID, not /dev/vdb1.
The login page loads, but the app can’t find the server / links point to an internal
address. JELLYFIN_PublishedServerUrl is missing or wrong. Set it in the compose.yaml
to https://jellyfin.YOUR_DOMAIN and restart with docker compose up -d (a restart isn’t
enough for the environment change to take effect).
Your problem is not listed? Search all error messages →
Maintenance & backups
Moving from 10.11 to 12
/emby/* and /mediabrowser/* are gone – very old third-party
clients lose their connection with it.- Apply updates deliberately. The fixed tag (
jellyfin:12.2) means: you decide when to update. Bump the tag →docker compose pull→docker compose up -d. Before jumping to a new major version, read the release notes – database migrations aren’t always reversible. - Use Jellyfin’s own snapshot function. Since version 12 there is a built-in snapshot feature under Dashboard → Backups that packs the database, metadata, subtitles and trickplay images into an archive. That’s exactly what you create before a version jump – it is no substitute for an off-site backup, though, because the archive sits on the same server.
- Back up the config, treat the media separately. The
configvolume (users, settings, playback state, metadata) is small and the actually valuable part – back it up encrypted off-site with Restic. The library itself is usually too large for a classic backup and reproducible from the original media; decide deliberately whether you back it up or classify it as “replaceable”. Honestly: a second backup of your movie collection costs real storage. - Monitor disk space. A library grows steadily. Keep an eye on usage
(
df -h /mnt/media) and best set up a monitor in Uptime Kuma that raises the alarm before the block storage is full. - Publicly reachable = secure it. The login page is on the net, and Jellyfin brings no two-factor authentication (not even via an official plugin). So consistently assign strong passwords, deactivate unused accounts – and for purely private use, consider making Jellyfin reachable not publicly but only via a VPN.
Last updated: Oct 19, 2026
Send feedback: feedback@serverkueche.de
You might also like